Learn how to use RatchetMaster Quick Release Pliers to disconnect push-lock fittings and other supported line connections.
Before you begin
Fully release all pressure before disconnecting water, air, or hydraulic lines. The original instructions require the system to be depressurized before using these tools. Wear safety glasses or goggles.
For hot-water overflow lines, turn the vehicle off and let it cool before removal. Fuel is flammable. Safely contain discarded fuel and review the original instructions and demonstration before working on fuel lines.
Watch the demonstration
See the pusher and gripper in action before you start.
Use the playback controls to pause, replay, or view the video full screen.
Choose the right tool
Vertical models approach the connection straight on. Angle models help reach connections in tight spaces.
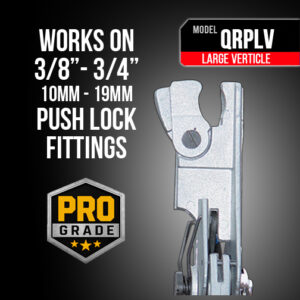
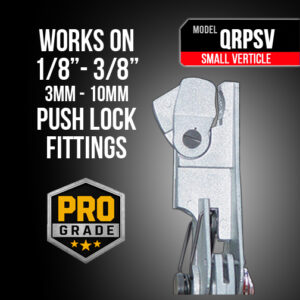
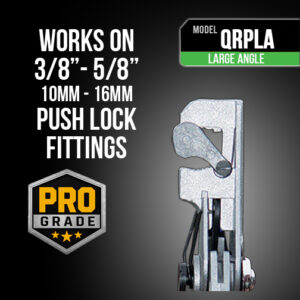
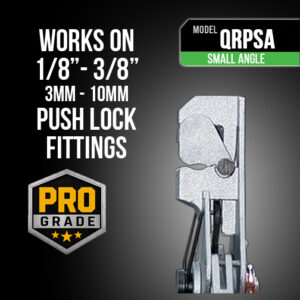
Choose the tool size that fits the line and connection. Identify the pusher, which presses against the fitting, and the gripper, which holds and pulls the line.
Disconnect a push-lock fitting
- Prepare the connection. Fully release system pressure, then select the appropriate model and size for the line.
- Position the pliers. With the pusher facing the fitting, slide the opening over the line as close to the fitting as possible.
- Check the pusher. Keep it firmly against the receiving end of the fitting. Do not let it ride over the edge of the push-lock connection.
- Squeeze slowly. The pusher presses against the fitting while the gripper holds the line and pulls it in the opposite direction. Continue until the line separates from the fitting.
Copper lines
The original instructions note that copper lines may require your thumb against the gripper to prevent slipping. Review the copper-line photograph on instruction sheet 1 before proceeding.
Other applications
Review the demonstration and the original illustrated instructions for the application you are working on.
PCV valves
Select the large or small vertical model to suit the line. Place the pusher toward the valve and position the pliers close to it. Squeeze slowly so the pusher presses against the valve while the gripper pulls the line away.
Fuel filters
The original instructions recommend the small vertical model (QRPSV). Set the gripper over the end of the inlet and the pusher on the end of the inlet, then squeeze slowly to separate the line from the filter.
Fuel is flammable. Safely contain discarded fuel. Follow the original illustration and video for positioning.
Water overflow lines
With the vehicle off and cool, select the appropriate vertical or angle model. Remove or move the clamp out of the way as shown in the video. Place the pusher toward the water tank, position the pliers close to the tank, and squeeze slowly to pull the line away.
Wiper assembly lines
Select the appropriate model. Face the pusher toward the plastic valve and position the pliers close to it. Squeeze slowly so the pusher presses against the valve and the gripper pulls the line in the opposite direction.
Original illustrated instructions
Open the full-size sheets to see the tool diagrams, before-and-after photographs, and detailed positioning.
Need help with your application?
Email directsource@ratchetmaster.com or call 843-837-2204. Include your tool model and a description of the connection.